
This week began a Weissenborn project. Based loosely on a style 3, this page I will highlight photographs of its construction. I will update it as I move along its completion. This is a special build with a delivery date of Mid April.

3/13/15 Completed Koa and Sitka Weissenborn Guitar by © Jay Rosenblatt 2015
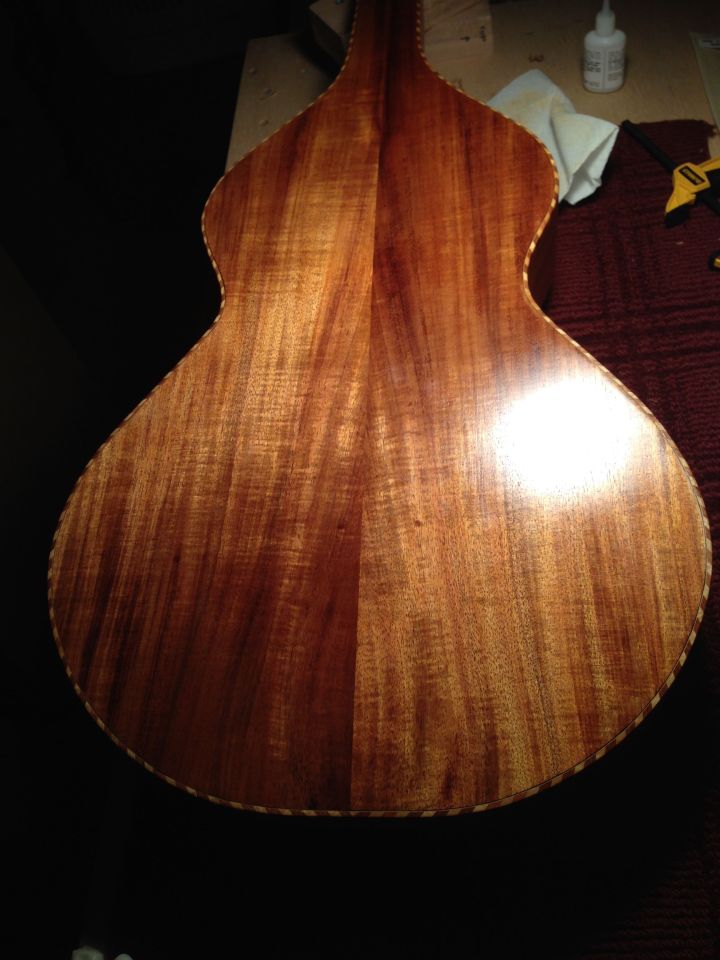
About the woods: This was constructed with Koa back and sides and an Alaskan sitka soundboard. The fingerboard is Macassar Ebony and came from LMI. The headstock is Mahogany which came from a 3×3 billet from Hibdon Hardwoods. The bridge of Honduran rosewood was also from Hibdon. The binding is a traditional Rope design made from scraps of maple and mahogany. The head plate is Koa. The pearl rosette was from the Duke Of Pearl. Ebony bridge pins with Abalone inlays were used and the position markers are Abalone too.
The Koa back and sides came from Notable Woods in Lopez, Washington. These are age dried pieces of Koa with a nice tone and appear to be very stable. The Sitka soundboard is of salvaged wood from Alaska Specialty Woods, Craig Alaska. The story behind the soundboard is that it came from a bridge stringer that once spanned over Back Bear Creek. It was a 63″ diameter log that was aquired by the mill in 1998, about 2 years after the bridge was pulled to be replaced replaced with steel bridge. The wooden car bridge was installed when the road there was used for logging in 1984-85. Now that road is used for recreation and to get to a hydro electric generator were water falling off the mountain from black bear lake is run through a turbine. The build is based on a template from Waldon Instruments. I have modified my braces to suit my building style.
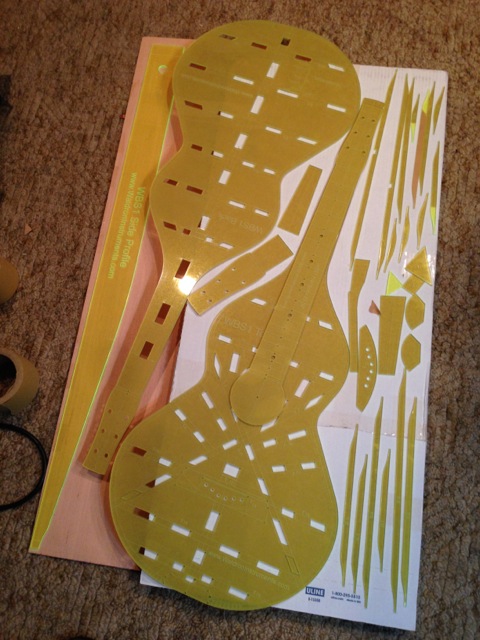
February 9th, 2015, Weissenborn template arrived from Waldron Music to be used for body and rough bracing dimensions.
All photography © Jay Rosenblatt, Jay Rosenblatt Guitars.

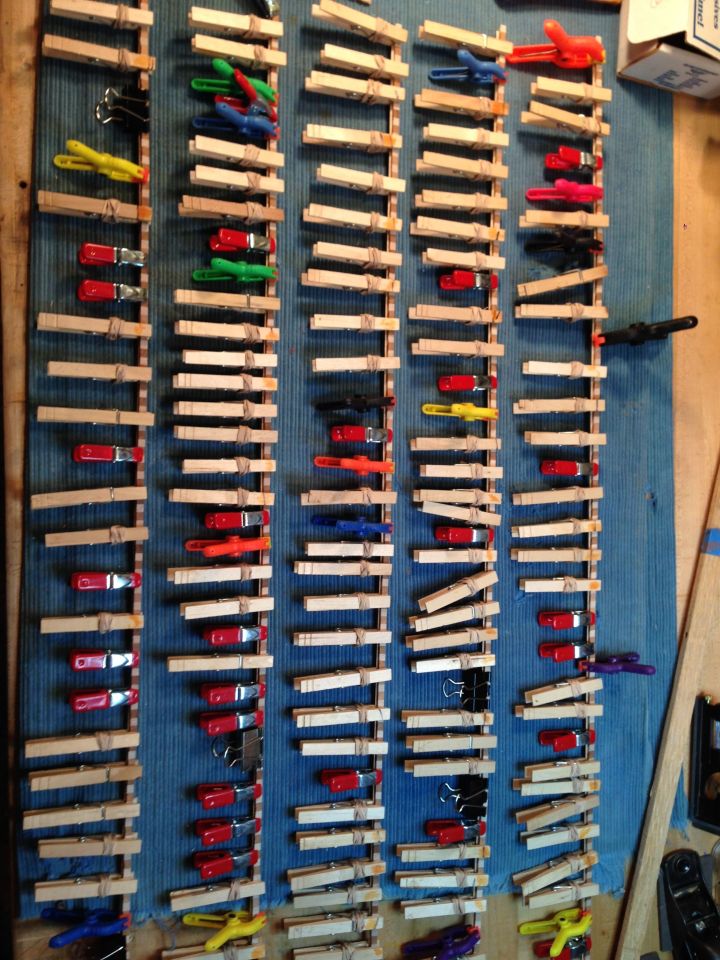
The Alaskan Sitka spruce top plates were jointed and joined together using clamps and weights to make a nice tight center line. Although those clamps look big I use very light pressure on them.
along

The template was traced to the top plates, cut out and sanded to thickness of about .115

An abalone rosette was installed with contrasting black fibre. This abalone came from the Duke of Pearl.
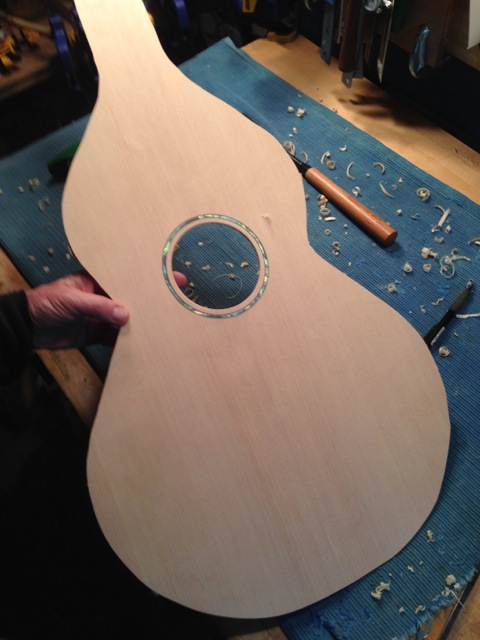
Abalone rosette installed and sound hole cut out

The Koa back and sides arrived from Notable Woods
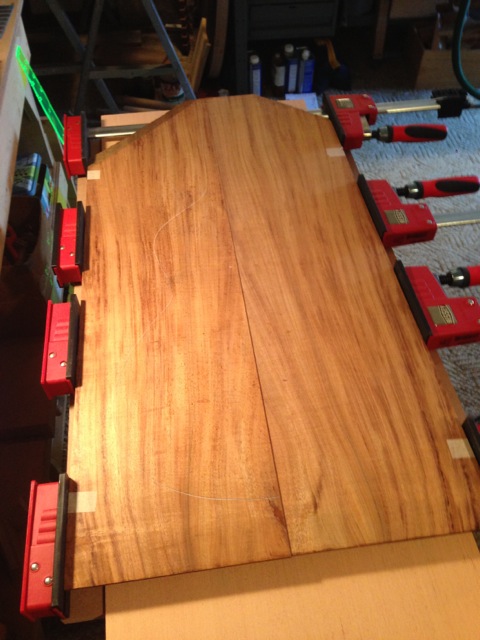
The Koa back plates being joined in a similar fashion as the top plates
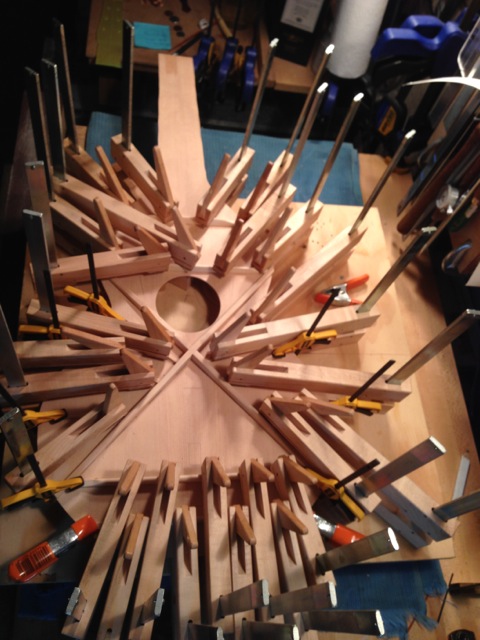
The bracing was cut, and installed using a clamp method

Tha back was patterened and thicknesses to about .095. The bracing for the back was cut and installed using go bars method.

The braces war carved, bridge plate installed and are ready to meet the instrument sides.

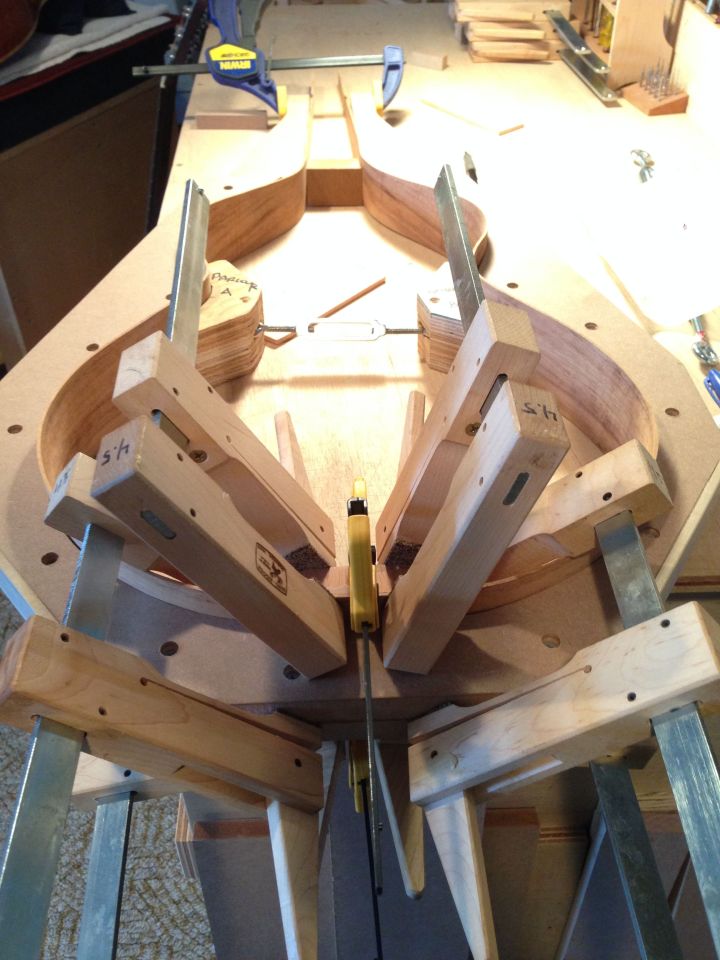
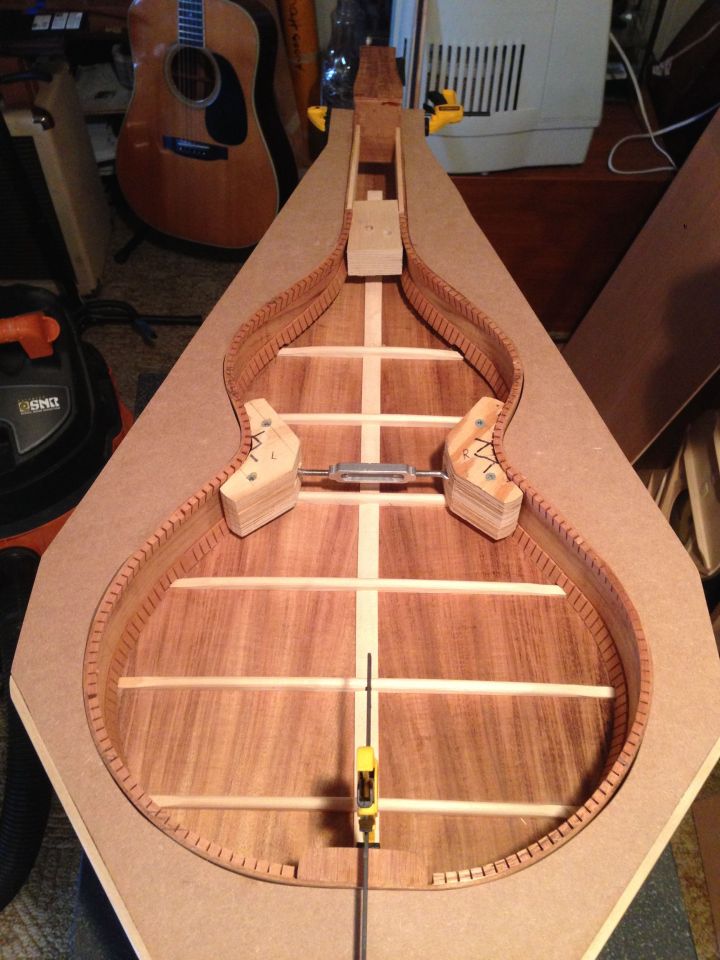
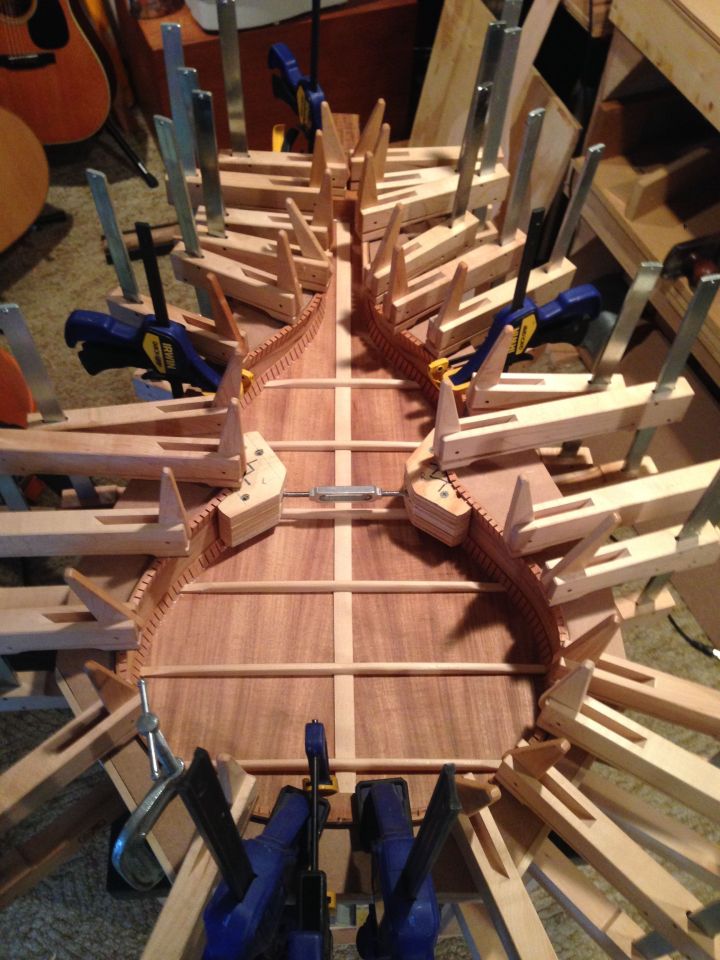
To aid in the assembly of the two plates to the sides an open ended form was constructed. The headsotck which attaches to the top, back and sides of the instrument can be held in place as it is clamped to the body.
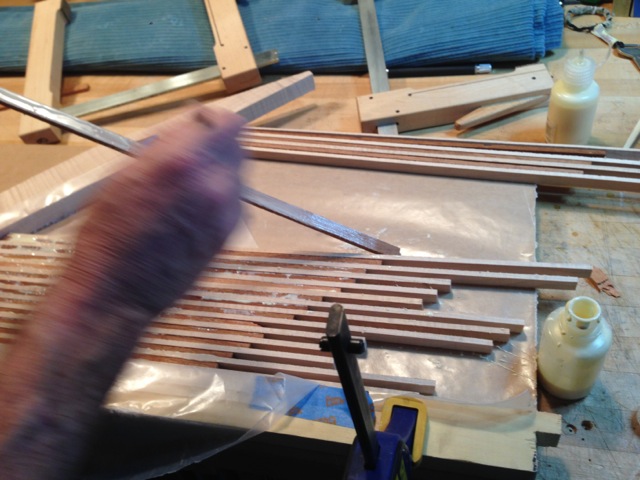


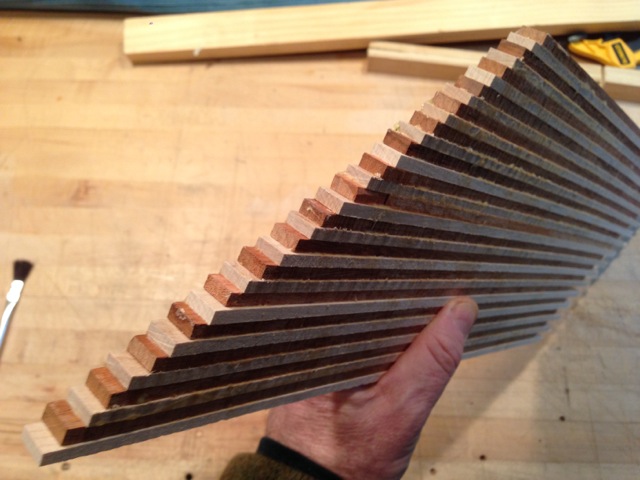
In preparation for the binding, traditional rope binding is made by laminating (here) strips of maple and mahogany together. These will be sliced diagonally into thin strips which will be installed as binding around the instrument and around the fingerboard and headstock.
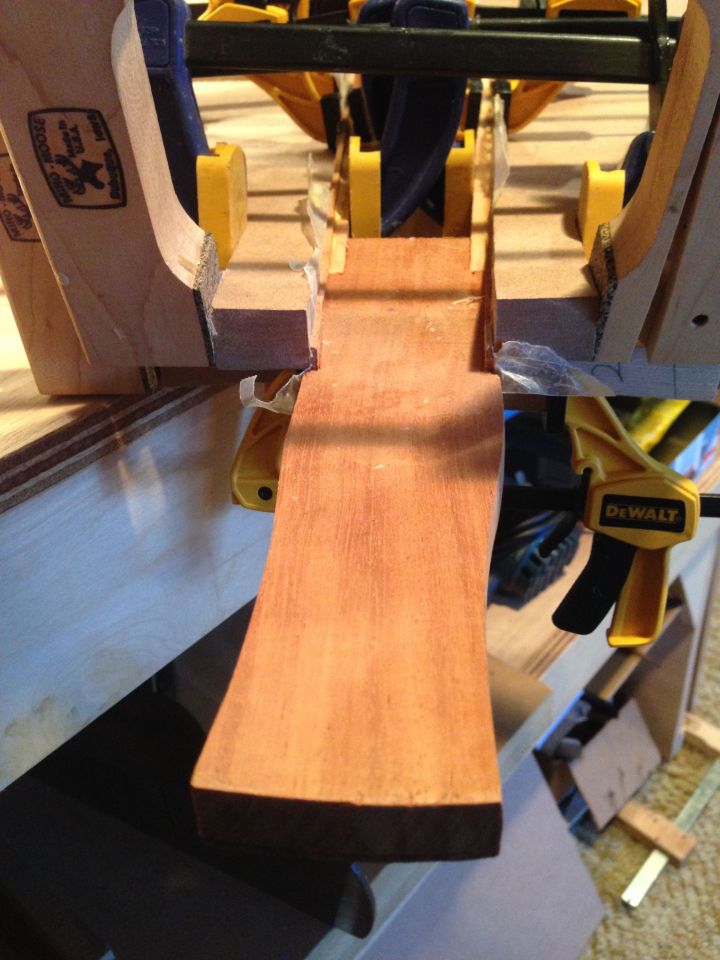
The side plates have been dimensions and brought to a thickness of about. .085. These will be hand bent on a bending iron.

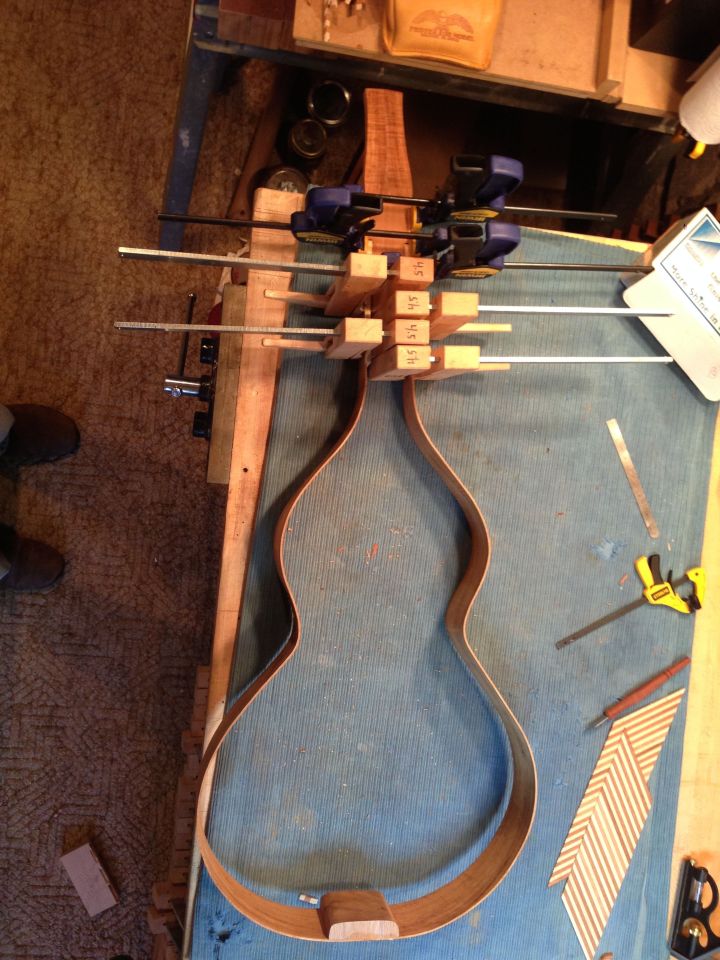
The sides are bent and cooling in the form awaiting the tail and headstock assembly and kefing.
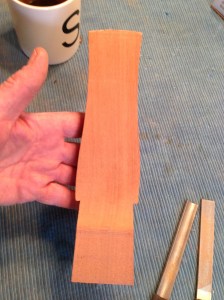
The headlock, which is actually the neck block too was fabricated from a solid piece of mahogany

Headstock layout
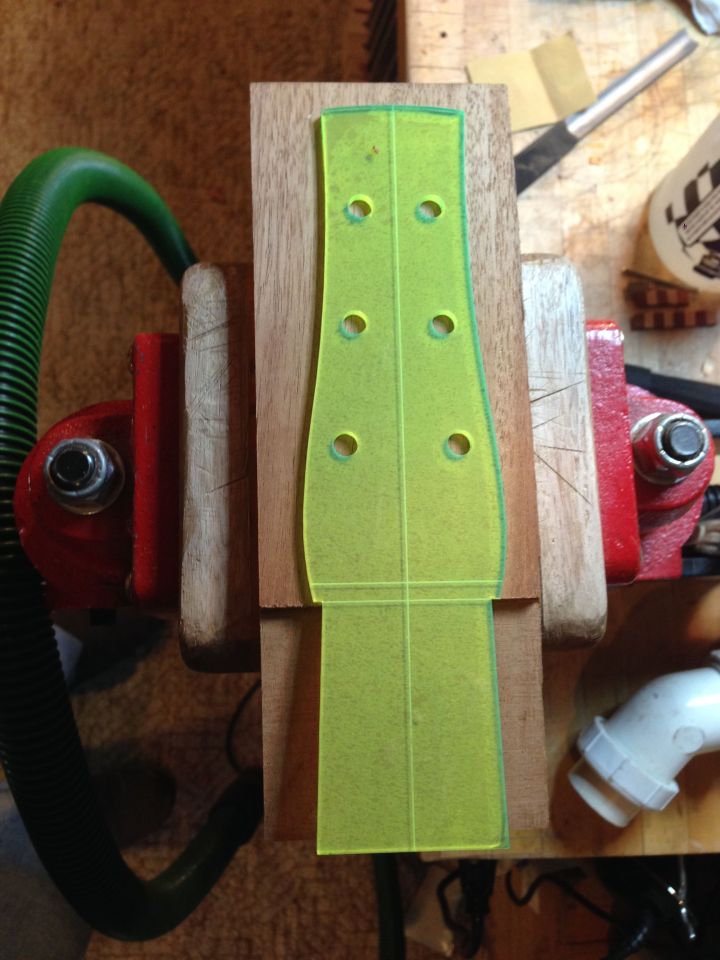
Traditional Weissenborn Headstock template used for outline. Cut to shape on a bandsaw
Weissenborn headstock rear view

The Weisssenborn headstock is cut from one piece of Mahogany with a book matched set of Koa head plated attached.
Tail block installed
Headstock glue-up in holding form
Headstock unit installed
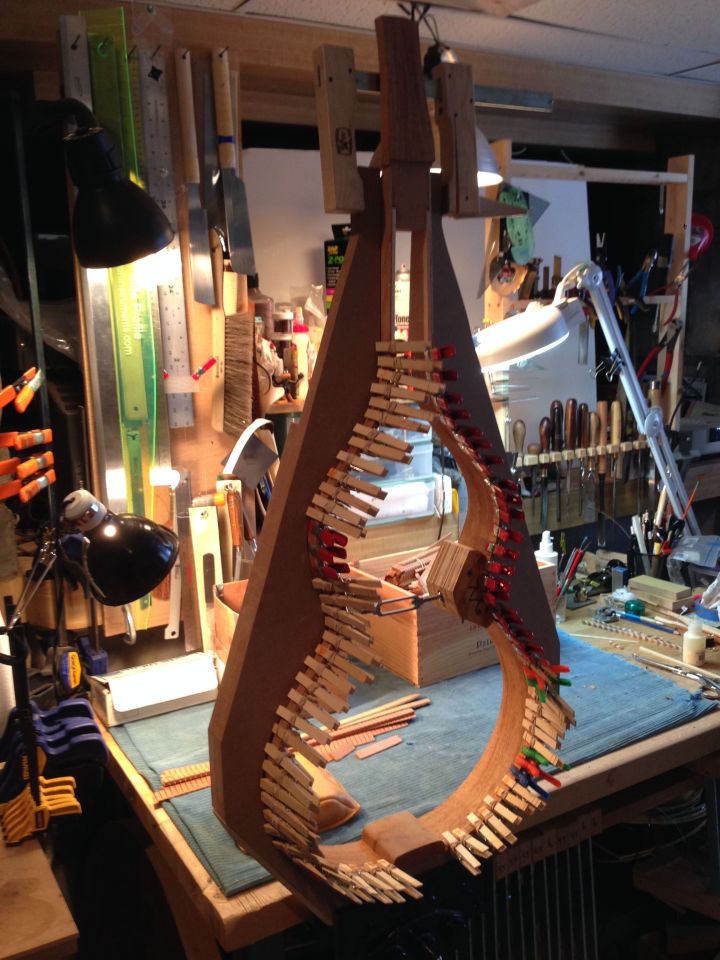
Kerfing being installed in the Weissenborn.
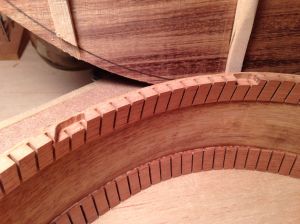
Notches for braces are routed
Notches for the back braces are cut and the back is checked for fit


A simple end graft is constructed from mahogany and rope binding and fit in a slot cut into the tailpiece.

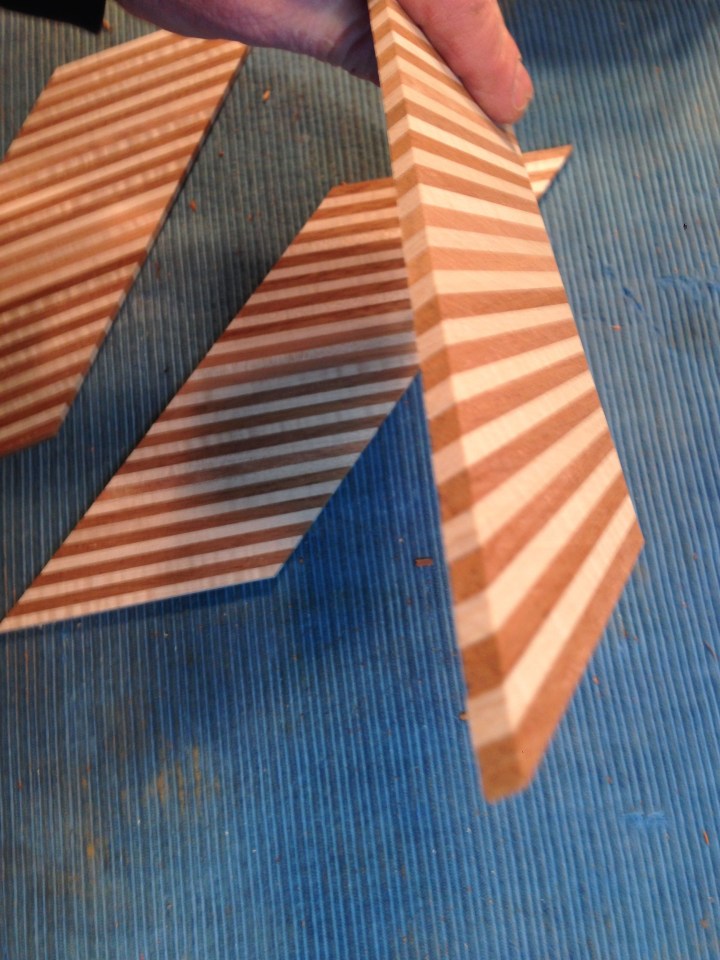

Rope binding is made by slicing the laminate I made and gluing the strips to a piece of b/w fiber strip
The sides are returned to the holding form, checked for square and level. The back is then glued to the sides. © Jay Rosenblatt Guitars

The sides have been attached to the back

The Sitka Spruce soundboard has been fitted and attached to complete the main structural components of this Weissenborn Lap Steel guitar. © Jay Rosenblatt guitars
When I removed this guitar from the form I noticed something unique to the instrument. When I tapped on the center of the soundboard, sort of a thump with my thumb, I was able to hear the sound that produced come out not only from the sound hole but I also heard it way up in the headstock. The vibrations traveled straight up through the hollow neck and emitted at the top of the guitar.
I have a little music box mechanism that plays a simple tune very quietly when you crank the handle. Barely audible without something to amplify its sound, like a wooden music box. I place it where at the bridge position to test the guitars responsiveness to a very quiet sound, essentially making the guitar the music box. (try it one day) The sound is greatly amplified and comes through the sound hole. When I put the mechanism at the top of the neck the sound transversely traveled down and out the sound hole almost as loud as from the bridge position. I am certain that the energy from the nut will also travel through the guitar and add to the sound of this instrument. Perhaps thats is little secret behind the Weissenborn’s unique sound.

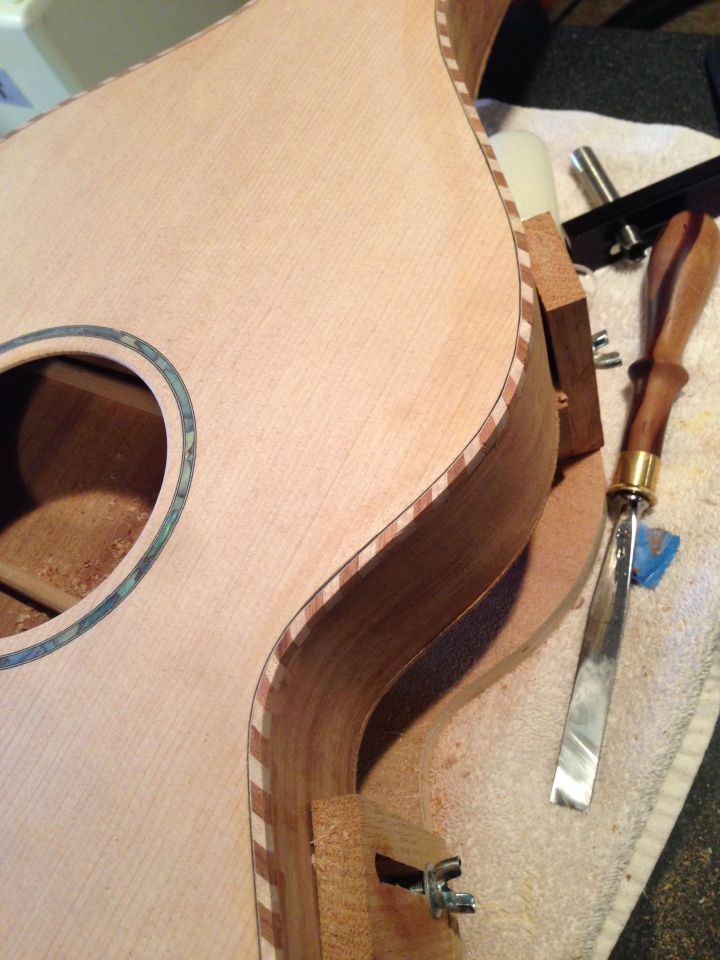
The Rope binding has been installed the top

February 23, 2015 The rope binding on the soundboard side is complete.
I have begun the finishing the body in preparation for the fingerboard and bridge, This is getting a hand rubbed shellac finish (french polish}. The back and sides Amber, 2 lb cut, and the top, Med-Dark Blonde, 1 LB cut.
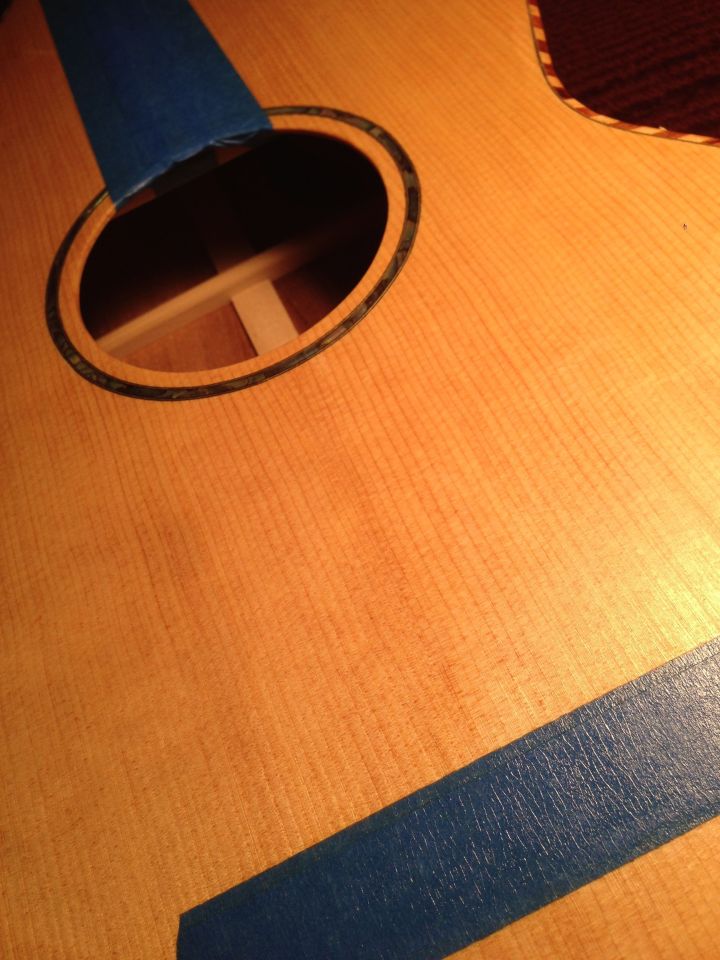
In this photo you can see the shimmer of the wood which is typical of KOA. This photo is also very close to the real color.

The fingerboard position markers are strips of maple inserted into the fret slots then sanded level

Rope binding and Abalone dots are added to the fingerboard. After sanding this fingerboard is only about 3.5mm thick.

3/7/15 The fingerboard is glued in place and clamped.

Almost nearing completion here. Next the nut, saddle, bridge, tuning machines and stringing
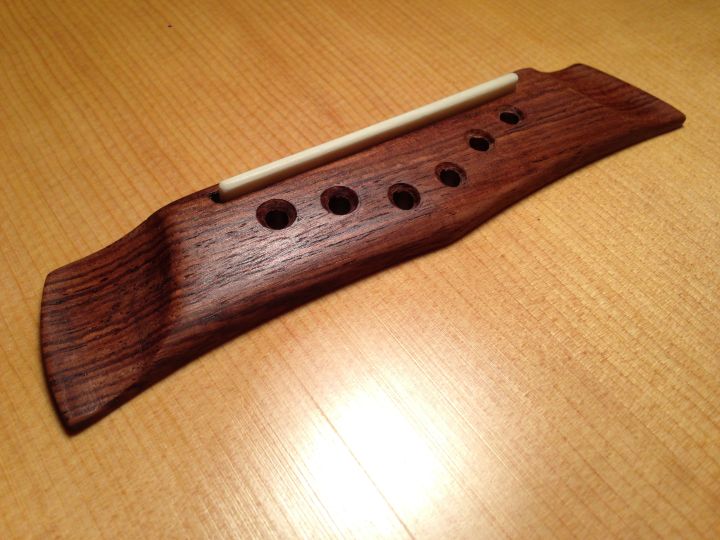
The bridge made from Honduran Rosewood. Carved to be similar to the original design, attached with hide glue.

The nut roughed in. This will be adjusted for size and slots cut for strings
The instrument is now complete and you can hear it here. http://www.smugmug.com/gallery/n-tzMqhN/ Pass Word “Weiss1”
The initial stringing sounds awesome. I used John Pearse Weissenborn strings, 80/20 bronze, 15 to 60. A final adjustments for string height and level across the tops will be performed, but as it is this Weissenborn has a rich tone, a beautiful natural reverb, good presence and response, and a lovely character.

Weissenborn Lap Steel Guitar handbuilt by Jay Rosenblatt
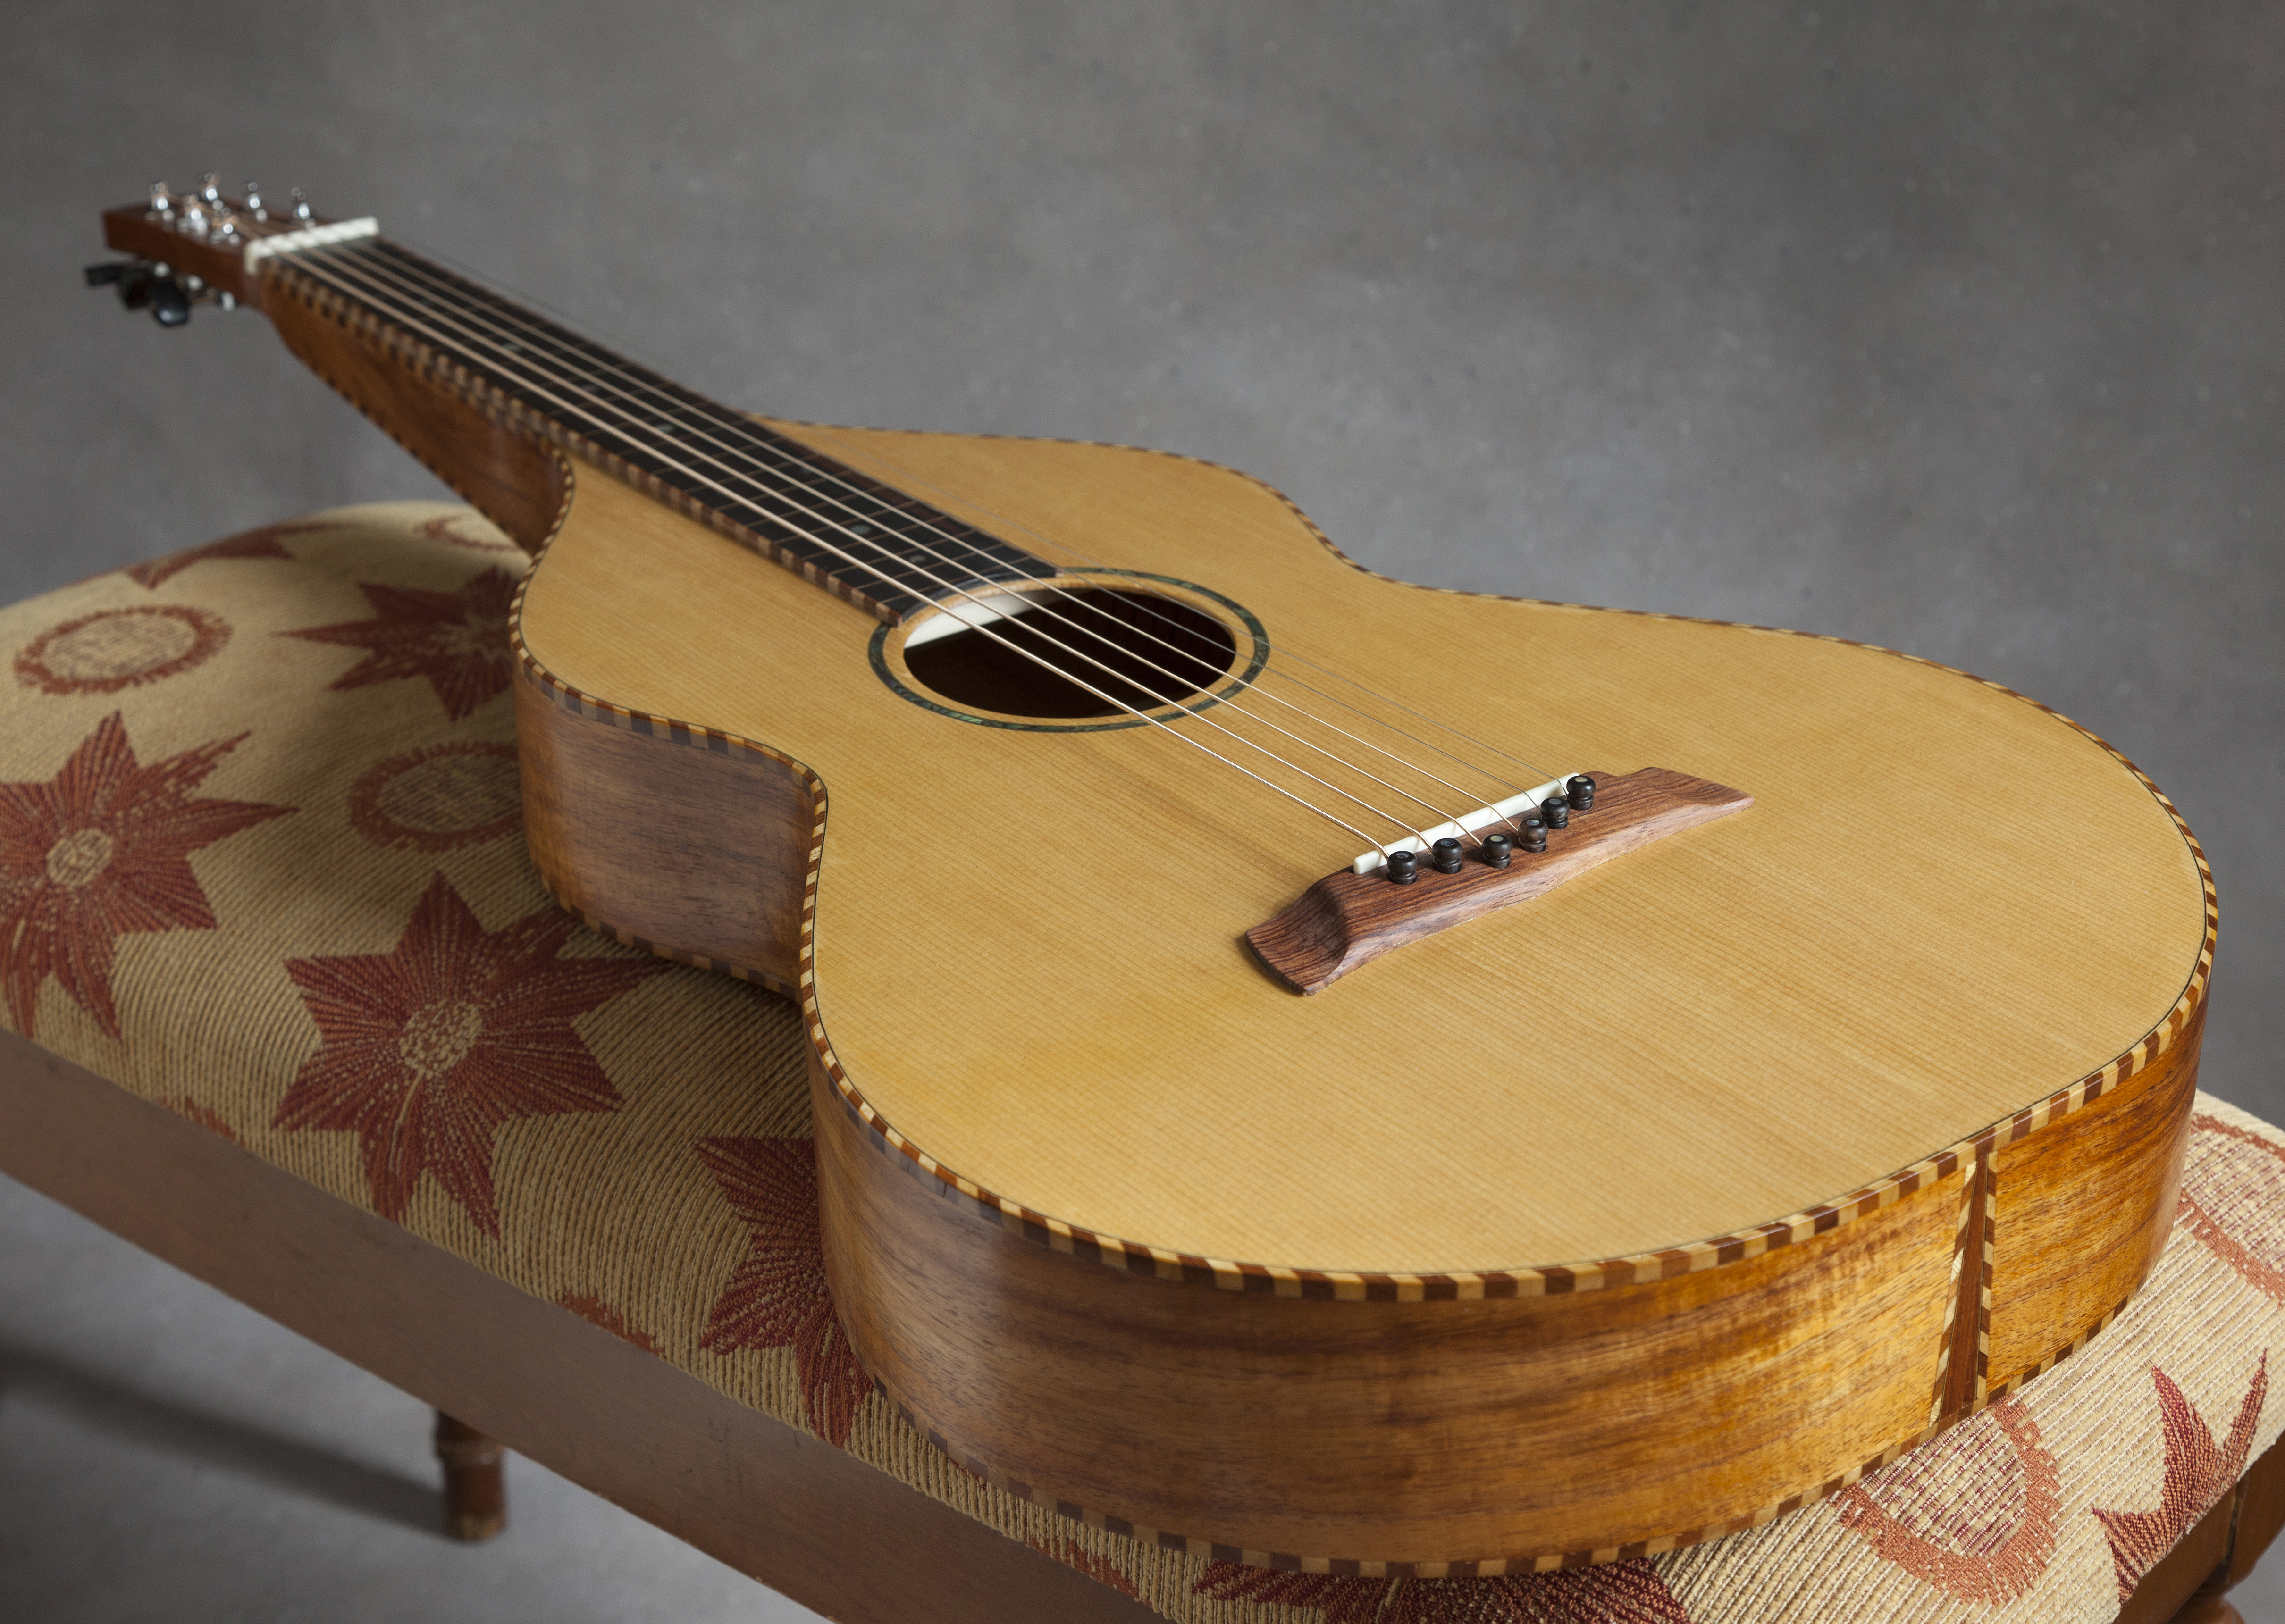
3/13/15 Completed Koa and Sitka Weissenborn Guitar by © Jay Rosenblatt 2015

Weissenborn Headstock Detail by Jay Rosenblatt Guitars

Weissenborn back headstock detail by Jay Rosenblatt Guitars

Weissenborn Fingerboard detail

Weissenborn Koa Back detail by Jay Rosenblatt Guitars
Thanks for looking. I hope you have enjoyed reading this as much as I have enjoyed building it!

Too much fun! I’ve always wanted to do that, but then you have another guitar laying around the house….
Jay thanks for sharing the pics I’m going to start on that same model hopefully next week. I’m going to use another Acacia that proliferates here in South Texas…. Mesquite.
Thanks
Jimmy
Great job, superior guitar. Many thanks and compliments from Bergamo, Italy.
Great review beautiful work I have built many acoustic guitars but never tried a Weissenborn. Your post gives me a much better understanding. One thing ,did you keep the back and top flat ? Or slightly radiused.
Cheers
I believe the bracing on that instrument is flat as the strings ride high, about 3/8 over the fingerboard. The template I used came from Waldron Music. They make all sorts of templates. Thanks and good luck!!
A beautiful job Jay, thanks for the pictures they are a real lesson.
Adrian Oats
Perth
Western Australia